Front-end interface
1
Navigate to API Section
Please head to the API section inside top right Account Panel.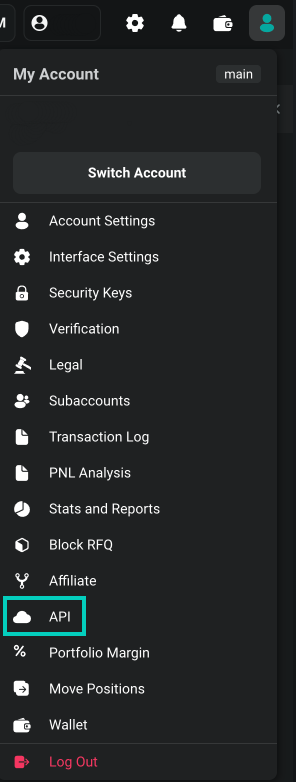
2
Add New Key
Press ‘Add new key’ on the right side of the interface.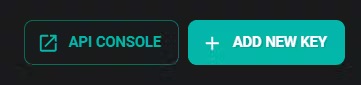
3
Select Key Type
Select between Deribit-generated key and Self-generated key. Please refer to Asymmetric API keys for more details on Self-generated keys.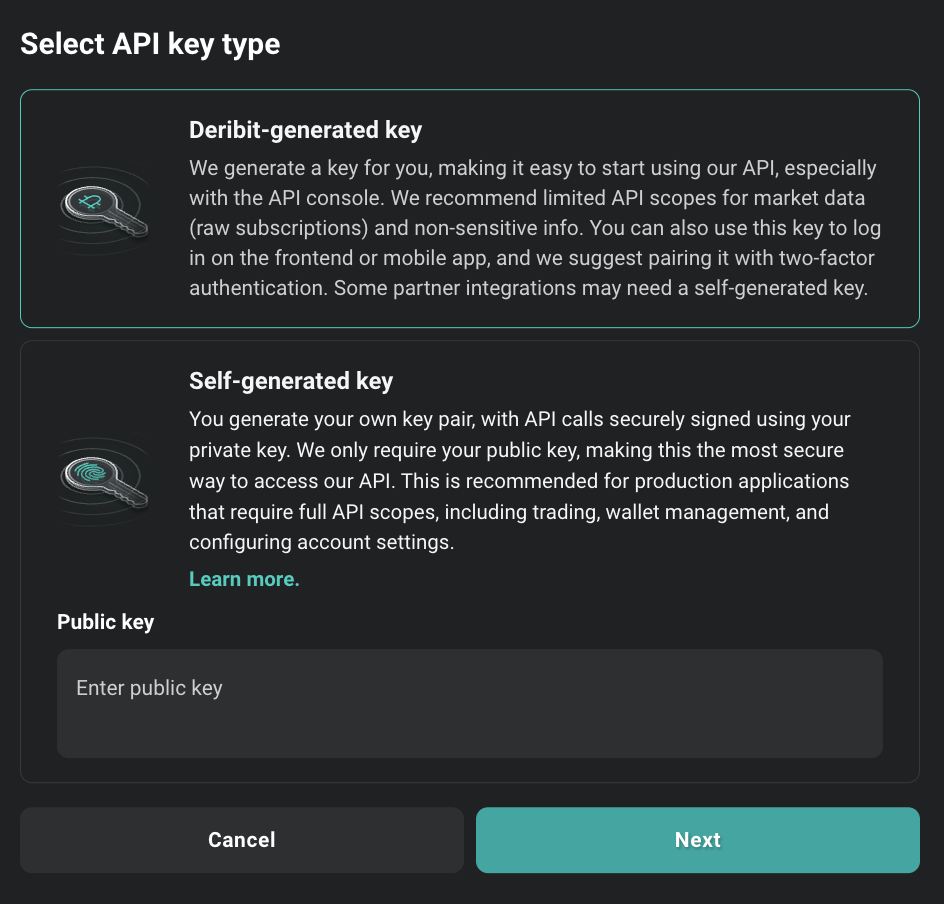
Asymmetric API Keys
Learn about self-generated keys for enhanced security
4
Configure API Key
Declare scopes and other API key details: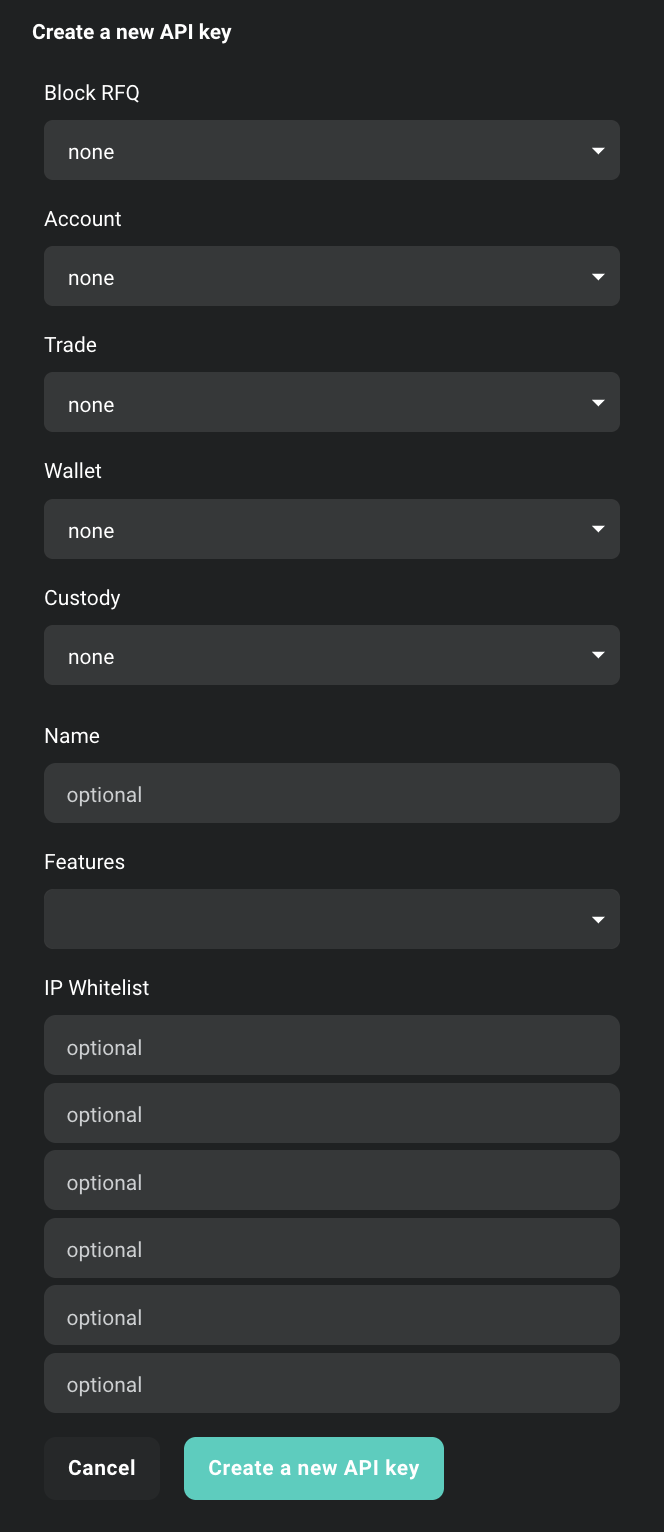 Once created you will receive Client ID and Client Secret
 However, keep in mind:
Configuration Options
- Scopes: Describes maximal access for authorization with given key. For more information about access scopes, refer to the section Scopes and Access Control below and consult official API documentation
- Name field: This is a custom input you can enter to use as an identifier for the key.
- Features field: Additional optional features related to this API key. They may be expanded in future releases.
Restricted Block Trades feature
Restricted block trades feature limits theblock_trade:read scope of the API key to block trades that have been made using this specific API key. This method can be employed to restrict the visibility of user private block trades with third parties to whom the user has provided their API key.Block Trade Approval Feature
Block trade approval introduces an additional layer to the block trade verification process. When activated, it necessitates an additional approval from the user from a different API key before a block trade can be executed with the specified API key. This functionality provides users with enhanced oversight, particularly when a registered partner possessing an API key intends to carry out a block trade on their behalf.- IP Whitelisting: An additional security feature, this field restricts which IPs can connect using this API key.
Client ID
The Client ID is a public identifier of the API key. It’s not a secret. It can be exposed in web browsers, source code, or wherever else without immediate security concerns. It’s mainly used to identify the key and is not used on its own for authentication.Client Secret
The Client Secret is a confidential piece of information. Think of it as a password. It should be kept secret and never exposed to the public. Exposing the Client Secret can lead to serious security risks. It’s used, in combination with the Client ID, to authenticate.Scopes and Access Control
Each API key on Deribit is assigned a default access scope, which defines the maximum permissions that can be granted when authenticating. These scopes determine what operations can be performed using the authenticated session.When calling thepublic/auth endpoint, you can request one or more access scopes by including them in the scope parameter, separated by spaces:- The requested scope cannot exceed the default scope of the API key.
account:read and you request account:read_write, the resulting token will still only have account:read access.- The effective scope of the authenticated session is a merge of:
- the API key’s default scope, and
- the requested scope, limited by the key’s permissions.
scope field of the public/auth response.Access Scopes
Learn more about access scopes and permissions
Creating the API key using the API
To create an API key via the Deribit API, use theprivate/create_api_key endpoint. Please note that this is a private endpoint and requires prior authentication through the public/auth method.
Request
Response
Creating read-only access for non‑trading stuff
For use cases like internal dashboards, monitoring tools, or finance reporting—where trading actions are not required—you can create a secure read-only API key. This setup ensures that the key can only retrieve data without being able to execute any orders or initiate withdrawals, which significantly reduces risk in case the key is ever exposed. When configuring your new API key, make sure to only assign read-only scopes. These typically include:block_rfq:read– view RFQsblock_trade:read– view existing block trades and trade historyaccount:read– access account detailswallet:read– check balances and transaction historytrade:read– review past trades and open positionscustody:read– used by third-party custodians when enabled by the client
:write. This ensures that the key cannot be used to place orders, transfer funds, or perform any actions that could impact your portfolio.
You may also consider enabling IP whitelisting to further restrict the usage of the key to trusted systems. This is particularly helpful for automation scripts or monitoring dashboards operating from static server locations.
This approach follows the principle of least privilege and is strongly recommended when API keys are used for integrations that do not require active trading functionality.
Authentication
You can authenticate using your API credentials in two ways:- Directly in the Deribit login web-page using “Log In with API credentials” option
- Using Deribit API by calling the
public/authmethod and passing yourclient_id,client_secret, and the desired read-only scopes